After 25 years of designing and building retaining walls across Long Island, I've seen my fair share of DIY projects – both successes and, well, let's call them "learning opportunities." Here's something most contractors won't tell you: with the right knowledge and preparation, many homeowners can successfully build smaller retaining walls. The key is knowing which projects you can handle and which ones require professional expertise.
In this comprehensive guide, I'll share the essential tips and techniques I've gathered from decades of experience, helping you understand if a DIY retaining wall project is right for you and how to do it correctly. And if you decide you need professional help, I'll show you what to look for in a qualified contractor.
Before You Start: Is DIY Right for Your Project?
DIY-Friendly Project Characteristics:
- Height under 4 feet: This isn't just a suggestion – it's typically a legal requirement. Walls over 4 feet usually require building permits and professional engineering. I've seen too many DIYers learn this the hard way after starting their project. Local building codes exist for a reason: taller walls face significantly more pressure and pose greater risks if they fail.
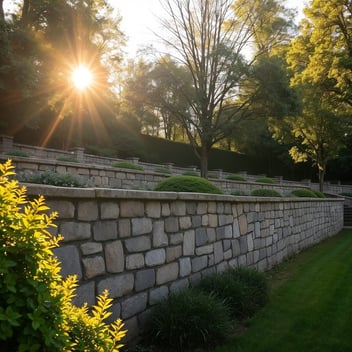
- Simple, straight designs: While curved walls can be beautiful (I've designed dozens of them), they require more advanced skills and careful planning. Straight walls are more forgiving for DIYers and easier to keep level and stable. They also typically require fewer cuts and modifications to your building materials.
- Good soil conditions: You'll want well-draining soil that's not overly sandy or clay-heavy. I remember a client who ignored my advice about their clay soil and tried a DIY wall – it failed within a year due to poor drainage and soil pressure. If you're unsure about your soil type, dig a test hole and consult a local expert.
- Basic slope conditions: The ideal DIY project involves a gentle to moderate slope without complications like underground utilities, large tree roots, or water management issues. Complex slopes often hide challenges that require professional experience to address properly.
If your project involves any of the following, I strongly recommend consulting with a professional retaining wall contractor:
- Walls over 4 feet high: These require engineering expertise and often special permits. The forces involved increase exponentially with height, and mistakes can be catastrophic. I've seen failed walls cause significant property damage and even threaten structural foundations.
- Complex drainage situations: If you're dealing with natural springs, heavy runoff, or other water management issues, professional expertise is crucial. Water is the number one enemy of retaining walls, and proper drainage design requires experience and technical knowledge.
- Tiered wall systems: Multiple walls working together require careful engineering to handle the combined forces. The interaction between tiers can create unexpected pressure points that need professional assessment.
- Walls supporting structures: Any wall that will bear the weight of buildings, driveways, or other structures needs professional design and installation. The stakes are simply too high for DIY experimentation.
Essential Planning Steps
1. Site Assessment and Preparation
- Call Before You Dig: This is non-negotiable. Contact your local utility marking service before any excavation. I've seen projects derailed by damaged utilities, which can be dangerous and expensive. The service is typically free, and it's your legal responsibility to use it.
- Soil Testing: Beyond basic visual inspection, perform a simple percolation test. Dig a hole about 12 inches deep, fill it with water, and time how long it takes to drain. Fast drainage (under 30 minutes) might indicate sandy soil that needs extra stabilization. Slow drainage (over 4 hours) suggests clay soil requiring additional drainage solutions.
- Measure Twice, Dig Once: Create detailed measurements and drawings of your planned wall. Include height variations, length, and setback requirements. I recommend using stakes and string lines to visualize the wall's location and identify any potential issues before breaking ground.
2. Material Selection
For DIY projects, I typically recommend concrete blocks designed specifically for retaining walls. Here's why:
- Interlocking Systems: Modern retaining wall blocks feature built-in locking mechanisms that help ensure proper alignment and stability. These systems are more forgiving for DIYers than traditional materials like natural stone. The interlocking features also create a consistent setback, which is crucial for the wall's stability.
- Material Calculations: Always order 10-15% more material than your calculations indicate you'll need. This accounts for cuts, breakage, and the inevitable learning curve. I've never met a DIYer who regretted having extra materials, but I've met plenty who had to halt their project mid-way to order more.
- Quality Considerations: Don't be tempted by the lowest-priced materials. Look for blocks rated for retaining wall use with good freeze-thaw durability ratings. The cost difference between good and mediocre materials is usually minimal compared to the labor involved and the potential cost of failure.
Construction Best Practices
1. Foundation Preparation
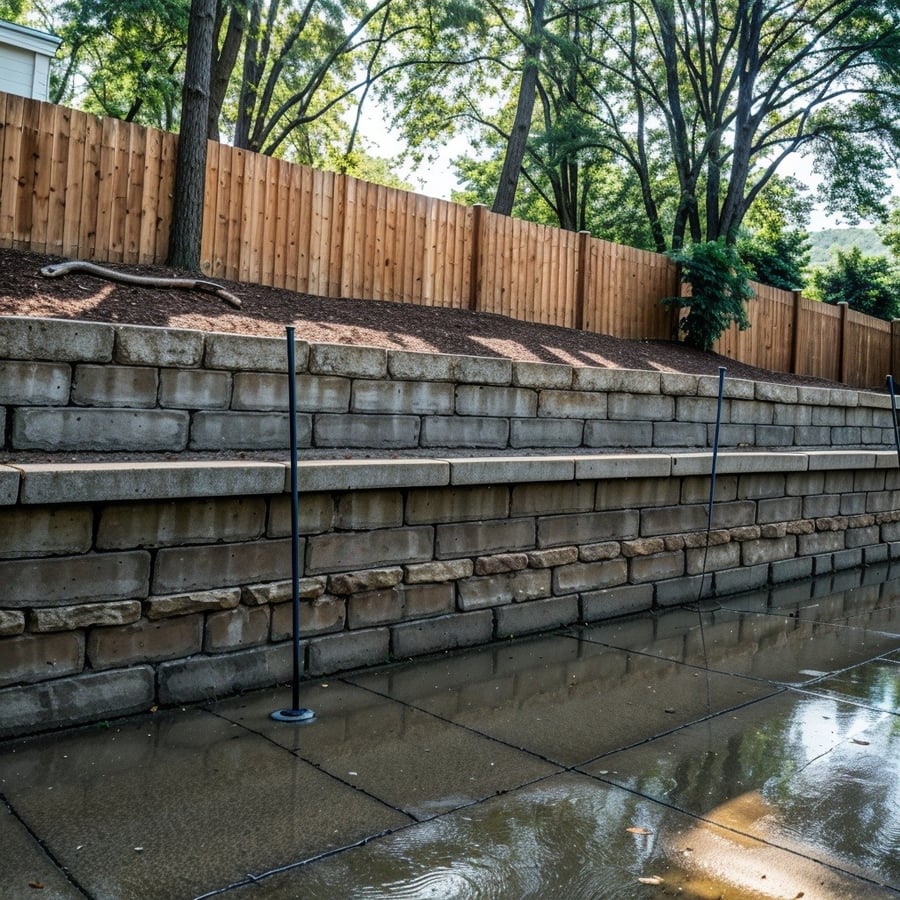
- Base Trench: Your foundation trench should be at least twice the width of your blocks and deep enough to bury 10% of the total wall height plus 6 inches for base material. For example, a 3-foot wall needs about 10 inches of buried course plus 6 inches of base material. The trench bottom must be level and compacted to prevent settling.
- Base Material: Use crushed stone or gravel (not rounded stones) for your base. Compact it in layers using a plate compactor. This step is crucial – I've seen many DIY walls fail because of poorly prepared foundations. The time you spend on proper base preparation will pay off in the wall's longevity.
2. Proper Installation Techniques
- Level and Plumb: Check every block for level in both directions (front-to-back and side-to-side) and ensure proper setback as you build. Small errors compound quickly and can't easily be fixed later. I recommend using a 4-foot level for accuracy and checking every few blocks with a string line to ensure overall alignment.
- Backfill and Drainage: Install drainage material (3/4-inch clean stone) and perforated pipe behind the wall as you build. Proper drainage is absolutely critical – it's the difference between a wall that lasts decades and one that fails in a few years. The drainage zone should be at least 12 inches wide behind the wall.
- Compaction: Compact backfill material in 6-inch layers. Poor compaction is a common DIY mistake that leads to settling and wall failure. Use a hand tamper for areas close to the blocks and a plate compactor for larger areas. Never use heavy equipment near the wall.
Common DIY Mistakes to Avoid
- Inadequate Base Preparation: This is the foundation of your wall's success. Skipping proper base preparation is like building a house on sand. The base needs to be level, properly compacted, and wide enough to distribute the wall's weight evenly. Take the time to get this right – it's much easier to fix problems at this stage than after the wall is built.
- Poor Drainage Planning: Drainage isn't just about putting some gravel behind the wall. You need a properly designed system including drainage stone, filter fabric to prevent soil contamination, and often a perforated pipe to direct water away from the wall. For more details on proper drainage solutions, check out our guide on retaining wall drainage solutions.
- Improper Backfill Material: Using native soil as backfill material is a common but potentially disastrous mistake. The backfill zone needs proper drainage material to prevent water pressure buildup. If you're unsure about materials, refer to our article on designing a retaining wall that lasts.
When to Call a Professional
Sometimes, the best DIY decision is knowing when to step back and call a professional. Here are clear signs you should seek expert help:
- Complex Site Conditions: If you encounter unexpected challenges like poor soil conditions, underground springs, or utilities that need to be worked around, it's time to consult a professional. These situations require experience and technical knowledge to address properly. You can learn more about handling these challenges in our article about avoiding common retaining wall mistakes.
- Project Scope Changes: If you realize during planning or early construction that your wall needs to be taller or more complex than initially thought, pause and reassess. Many DIY projects evolve beyond their original scope, and it's better to recognize this early rather than proceed with a project that exceeds your capabilities.
- Building Code Requirements: When your project requires permits or engineering approval, working with a qualified contractor is usually the most efficient path forward. They'll understand local regulations and can handle the permitting process. For guidance on selecting the right professional, see our guide on choosing a retaining wall contractor.
Maintenance and Long-term Care
- Regular Inspections: Check your wall at least twice a year and after major storms. Look for signs of movement, bulging, or water damage. Early detection of problems can prevent more serious issues. Pay special attention to drainage outlets and ensure they remain clear and functioning.
- Drainage Maintenance: Keep drainage outlets clear of debris and vegetation. If you notice water pooling behind or around your wall, address it immediately. Poor drainage is the leading cause of wall failure, but regular maintenance can prevent most problems.
- Vegetation Control: While plants can enhance the appearance of your retaining wall, be careful about what you allow to grow near it. Large roots can disturb the wall's structure, while small plants can help prevent erosion. Choose appropriate plants and maintain them properly.
Conclusion
Building a retaining wall can be a rewarding DIY project when approached with the right knowledge and preparation. Remember that success lies in careful planning, proper technique, and knowing your limitations. If you're uncertain about any aspect of your project, don't hesitate to reach out to a professional. The investment in professional guidance or installation is always less expensive than fixing a failed wall.
For more complex projects or if you decide professional installation is the better choice, explore our retaining wall construction and repair services. We're here to help ensure your retaining wall project is a success, whether you build it yourself or choose professional installation.